 Pin It
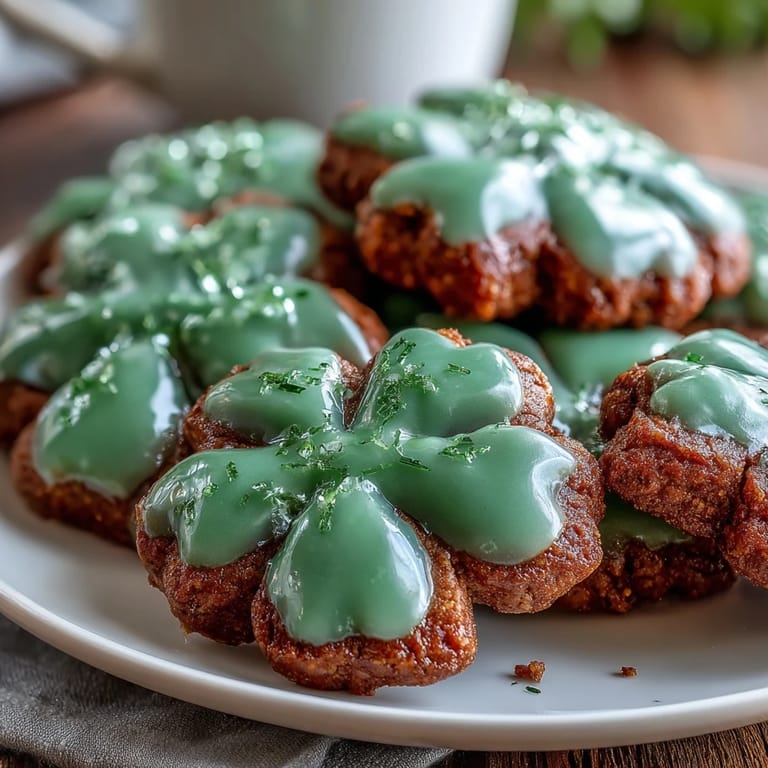
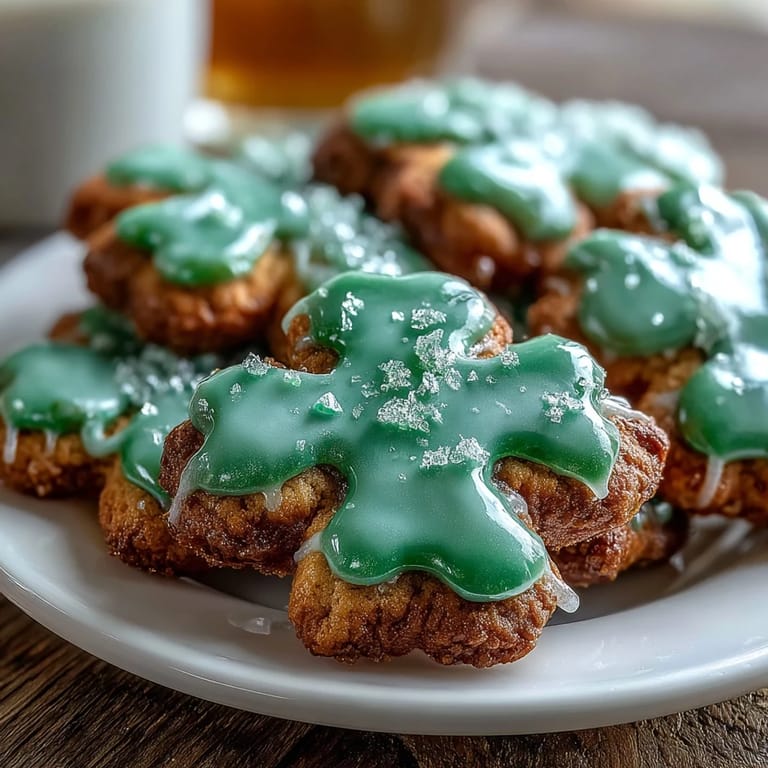
 My kitchen smelled like butter and vanilla the afternoon my niece insisted we make something green for St. Patrick's Day, and these shamrock cookies became our annual tradition. There's something about shaping dough into little three-leaf clovers that makes you feel like you're creating luck, one cookie at a time. The bright green icing was her favorite part—watching her carefully pipe it onto each cooled cookie, tongue sticking out in concentration. What started as a simple request turned into the one thing our whole family now expects on March 17th, and honestly, I wouldn't have it any other way.
I'll never forget bringing a tin of these to the community potluck and watching them disappear faster than the potato salad—usually a safe bet at any gathering. One woman came back asking for the recipe, and when I told her about the almond extract, she got this far-off look like I'd just shared a secret ingredient to happiness. That's when I realized these cookies meant something beyond the occasion; they became the thing people asked about in September, nine months before St. Patrick's Day even rolled around.
Ingredients
- All-purpose flour (2 1/2 cups): The foundation of structure; sift it with the baking powder and salt so everything distributes evenly and you avoid those rare dense spots.
- Baking powder (1/2 teaspoon): Just enough lift to make these cookies tender without making them cakey—don't skip the whisking step.
- Salt (1/4 teaspoon): Brings out the butter and vanilla flavors in ways that seem invisible until it's missing.
- Unsalted butter (3/4 cup, softened): Softness matters here; if it's too cold, your creaming time doubles, and if it's too warm, your dough spreads in the oven.
- Granulated sugar (1 cup): The granules help create that slightly crispy edge while the center stays tender.
- Large egg: Binds everything together and adds a touch of richness that plain dough can't achieve.
- Vanilla extract (1 teaspoon): Vanilla is the backbone of these cookies; don't cheap out here.
- Almond extract (1/2 teaspoon, optional): This is my secret—it adds a subtle depth that makes people ask what's different about your cookies.
- Powdered sugar (2 cups): For the icing; sifting it first prevents lumps that ruin your beautiful green coating.
- Meringue powder (2 tablespoons): Creates that smooth, glossy icing that hardens without cracking—it's worth seeking out in the baking aisle.
- Water (3–4 tablespoons): Room temperature water whisks in smoothly; cold water can cause the icing to seize.
- Green gel food coloring: Gel colors produce vibrant greens without thinning out the icing like liquid colors do.
Tired of Takeout? 🥡
Get 10 meals you can make faster than delivery arrives. Seriously.
One email. No spam. Unsubscribe anytime.
Instructions
- Whisk the dry team together:
- In a medium bowl, whisk flour, baking powder, and salt together until they're evenly distributed. This step matters more than it sounds—it prevents dense pockets in your final cookie.
- Cream butter and sugar:
- In a large bowl with an electric mixer, beat softened butter and sugar for about 2 minutes until the mixture turns pale and fluffy. You're incorporating air here, which helps the cookies rise gently in the oven.
- Add the wet ingredients:
- Beat in the egg, vanilla extract, and almond extract (if using) until everything is combined. Scrape down the sides of the bowl with a spatula so nothing gets left behind.
- Bring it all together:
- Gradually add the dry ingredients to the wet ingredients, mixing on low speed just until the dough comes together. Overmixing develops gluten and makes cookies tough, so stop as soon as you don't see flour streaks.
- Chill the dough:
- Divide the dough into two discs, wrap each in plastic wrap, and refrigerate for at least 1 hour. Cold dough is easier to roll and cut without sticking, and it spreads less in the oven.
- Roll and cut:
- Preheat your oven to 350°F (175°C) and line baking sheets with parchment paper. On a lightly floured surface, roll out one disc of dough to 1/4-inch thickness, then cut out shamrock shapes using your cookie cutter.
- Arrange on the pan:
- Place cut cookies about 1 inch apart on the prepared baking sheets. Give them room to bake evenly without touching.
- Bake to golden edges:
- Bake for 8–10 minutes, watching closely for golden edges. The centers should still look slightly pale and soft—they'll continue cooking after you remove them from the oven.
- Cool properly:
- Let cookies rest on the pan for 5 minutes so they set up, then transfer them to a wire rack to cool completely before decorating. Warm cookies will mess up your icing.
- Make the royal icing:
- In a bowl, combine sifted powdered sugar and meringue powder. Add room temperature water and vanilla extract, then beat with an electric mixer on low speed for 5–7 minutes until smooth and glossy.
- Color your icing green:
- Add green gel food coloring a tiny bit at a time, mixing well after each addition until you reach your desired shade. Gel colors are concentrated, so a little goes a long way.
- Pipe and set:
- Transfer the icing to a piping bag fitted with a small round tip. Outline each cookie first, then flood the inside with icing. Let set for at least 1 hour before serving or stacking.
 Pin It
 There was a moment last March when my six-year-old nephew sat at the kitchen table, grinning at his plate of shamrock cookies with green icing dripping down the sides, and he announced these were "basically luck you can eat." I realized then that food carries meaning in ways sugar and flour never could on their own. These cookies became proof that simple ingredients can hold real joy.
Storage and Keeping
Once the icing has completely set, these cookies store beautifully in an airtight container at room temperature for up to a week. I like to layer them between parchment paper so the icing doesn't stick together, and they stay just as delicious on day five as they are on day one. If you're making them ahead for a party, bake the cookies and store them undecorated for up to three days, then decorate them the day before serving so the icing looks fresh and vibrant.
Adjustments and Variations
For softer, chewier cookies, reduce the baking time by one minute—that tiny change makes a noticeable difference in texture. If you want to add extra flair, sprinkle edible gold glitter or colorful sprinkles onto the wet icing before it hardens; the timing is everything, so work quickly. The almond extract is optional but genuinely improves the flavor; if you skip it, the cookies still taste good, but they lose that subtle something that makes people ask for your recipe.
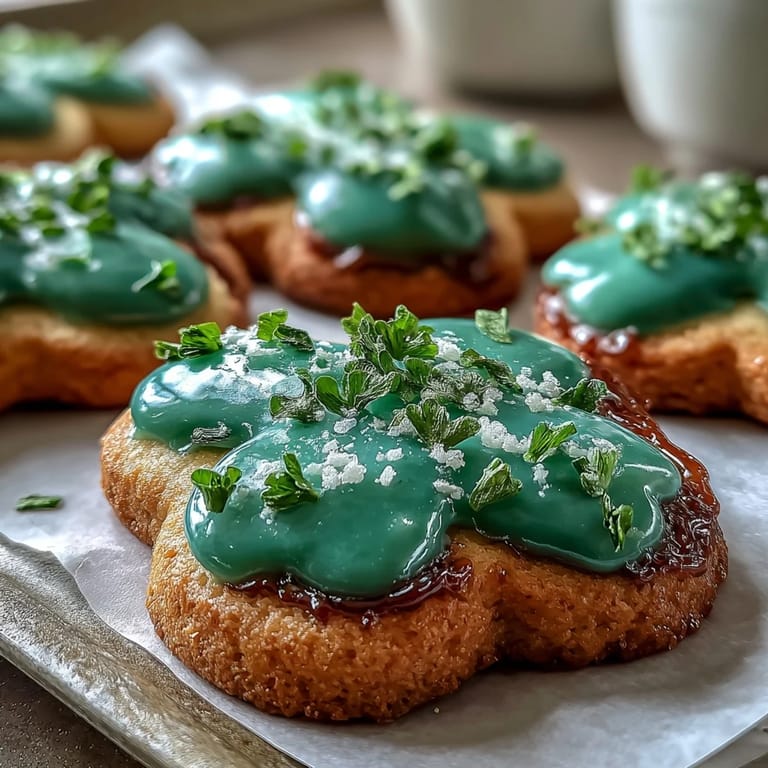
Decorating Ideas and Tips
Royal icing gives you endless decorating possibilities once you get comfortable with the piping bag. Start by outlining the shamrock shape with a steady line, then fill it in with a flooded icing (slightly thinner consistency) that smooths out as it sets. The patience you develop waiting for one batch to harden before stacking another is its own kind of meditative—there's no rushing green icing.
- Edible gold glitter or pearl dust adds shimmer and makes cookies look bakery-worthy within seconds of application.
- White icing outlines on top of green backgrounds create a striking contrast that photographs beautifully for social media or gift giving.
- Keep a damp paper towel nearby while decorating to wipe your piping bag tip between cookies—clean lines come from a clean tool.
 Pin It
 Making these shamrock cookies has become the way my family marks the arrival of spring, even if we're eating them in the rain or snow. They're proof that the smallest traditions—shaped dough, bright green icing, a kitchen filled with butter and laughter—become the moments we remember forever.
Recipe Q&A
- → What makes these cookies perfect for St. Patricks Day?
The shamrock shape combined with vibrant green royal icing captures the festive spirit and traditional symbols of the celebration.
- → How should I store these cookies to keep them fresh?
Store the cookies in an airtight container at room temperature for up to one week to maintain texture and flavor.
- → Can I omit the almond extract without affecting taste?
Yes, almond extract is optional and adds a subtle nutty nuance; the cookies remain flavorful without it.
- → How is the royal icing prepared and colored?
Royal icing is made by mixing powdered sugar with meringue powder, water, and vanilla extract, then tinted with green gel food coloring for vibrant decoration.
- → What is the best way to ensure cookies have a crisp texture?
Chilling the dough for at least an hour before rolling and baking helps achieve a tender yet crisp cookie.